Thursday, July 14, 2022

Microscopy in Anatomy & Physiology - Central Nervous System Lesson


 Following up on my last post regarding microscopy as a teaching tool, I want to share with you some of the work my Anatomy and Physiology 2 students completed this semester with prepared slides of nervous system tissues - spinal cord and brain. Once students have successfully focused the microscope slides, I encourage them to use their cell phones to capture photographs of their views.  

Cerebellum - student cell
phone photograph 
Cerebellum - Student drawing 


With many years of experience, as the teacher, you are very familiar with the tissues and their appearances that your students are working with, and what to expect when you look at their drawings. I've seen several lovely drawings of water bubbles (wet mount slide preparations by students) or dust specks. A couple of years ago I would have asked the students to step aside and let me take a look through their scope to assess their focusing skills. During COVID, I did not check looking through the scopes as we were practicing distancing. (When students were done working, I had them use alcohol pads to wipe down the eyepieces and knobs) That's what makes the use of phone camera shots in the lab another good assessment tool.  In addition, you can zoom in on the photographs and see even more details. Plus the students will have a record of the slides that they can refer to and study from should you plan on a lab practical. 

For this lesson, I wanted the students to identify key features of the tissues under observation. I generated the lab sheet below with the instructions for coloring and labeling. Students had the list of vocabulary terms that needed to be labeled. 

Central Nervous System Microscopy Lab Sheet 
Student Work Sample 


Tuesday, July 05, 2022

Under the Microscope


Dandelion under the microscope
pollen grains visible

One of the most enjoyable skills for me to teach to students is the use of the microscope. It seems to garner the most student "wows" and "ah-ha" moments. Through lecture, textbook reading, and other activities we teach our students about cellular structure, have them label the parts, draw or sketch the organelles, model with clay or other materials, but seeing them up close and personal seems to make it real. 

To scrape the inside of your cheek and smear it on a slide, add a drop of stain and a coverslip and then look through the eyepiece and see a piece of you can have a major impact on a student. This photo was the result of a brain/mask break last fall. A walk around the track and a student's lovely gesture of plucking and presenting me with a dandelion blossom. When we returned to the lab, they continued to work on their Gram staining technique, and I made a wet mount slide. 

Thursday, July 13, 2017

Photosynthesis and Cellular Respiration Foldable

Photosynthesis and Cellular Respiration
Side by Side Foldable cover
If it is one thing I want my biology students to remember when they leave my class is to understand the interconnectedness of the two major energy systems in living organisms - photosynthesis and cellular respiration. This is the circle of life (imagine the theme song from The Lion King playing here).

For this foldable, take a sheet of paper, fold almost in half in order to allow a little overhang to serve as the folding closure. Cut down the middle to form the two half flaps.

I have also done this assignment in interactive notebooks.

Inside of Foldable 
As you can see, they used their textbooks to draw the diagrams of the chloroplast and mitochondria including all labels. Inside they diagramed the Light Dependent and Light Independent processes of photosynthesis and the three stages of respiration - glycolysis, Krebs (Citric Acid) cycle, and electron transport chain. The last diagram is essentially the carbon cycle showing how plants (which carry out both functions) and animals are related. Plants capture energy from the sun in order to make ATP which provides the energy for the chemical reactions converting carbon dioxide and water into sugars. The plants can then use those sugars (more importantly for us humans who eat the plants) to carry out cellular respiration to make ATP to provide the energy for all of life's processes - growth, reproduction, movement, etc.

"And yes, I want you to use color!" - answer to most commonly asked student question

Monday, January 23, 2017

Density Column Lab

Egg Drop Density Column Lab
It was midterm season once again and I was looking for a new lab for my Chemistry students to complete for their practical portion of the exam. I went hunting for a lab that would incorporate prior knowledge and showcase the student's ability to follow a lab procedure with little to no instruction from me, utilize the measuring skills that we have worked on all semester, demonstrate their understanding of laboratory safety rules, and to work independently. I found the answer in The Egg Drop Lab.

Because of time constraints (a two hour exam period that included a written portion) I set up the lab stations to include four liquid samples (I chose dark corn syrup, dishwashing liquid, vegetable oil, and rubbing alcohol into which I added blue food coloring) in graduated cylinders and indicated the empty mass of the glassware. I randomly filled the cylinders with differing volumes and the students had to calculate the density and predict what would happen if they added the four liquids to a test tube. Then they built a column to test their predictions. The lab procedure then asks them to predict where in the column water would settle and then to test that prediction. The next step was to determine the density of an egg and predict where in a column it would end up when dropped in. To minimize the amount of material used, I built the column using the student's input. The results are shown here. In addition I colored water with red food color and added it to the column before dropping in the egg.

What was really nice about this lab is the author designed this for an Earth Science course so it was an opportunity for me to have my students see the connection between what they have learned in Chemistry as it applies to the other sciences.

Monday, October 20, 2014

Field Trip on the Nashua River

View of the Nashua River
The Nashua River was once one of the most polluted rivers in the US. Squirrels were able to cross upon the paper pulp discharged from several mills along the river's banks, not to mention the garbage from town dumps, farm run-off and raw sewage. Tests completed for water quality showed there to be no dissolved oxygen, the key indicator for life in a body of water. Then Marion Stoddart, began her campaign to reclaim the river for her children and the children of all the communities abutting the river. She wanted to see people fishing, swimming, and enjoying the river. It was an enormous undertaking for a housewife, but through shear determination and the help from many who believed in her, the state of Massachusetts was the first in the nation to enact a Clean Water Law which eventually led to the US government enacting a federal Clean Water Act.

Today the river is classified as a Class B river - fishable and swimmable. The community I teach in is part of the Nashua River Watershed and I felt it important for my Ecology class to learn about the history of this river and to enjoy the benefits of Marion Stoddart's hard work. Through the Nashua River Watershed Association you too can participate in their River Classroom programs. We spent a couple of delightful hours out on the water where all the students were able to experience the role of paddler, data collector, and citizen scientist. At the high school level the program focused on conducting water quality testing (nitrate, phosphate, dissolved oxygen, temperature, pH, turbidity) on the water and aquatic life studies on the shore line. This data will prove valuable as we will be able to carry out the same tests at our school site and compare the health of the pond at school to that of the river. We will also be conducting tests on soil quality at school, so this was an excellent introduction for my students.

In order to prepare for our trip, I read to my students Lynne Cherry's children's book A River Runs Wild. With its beautiful illustrations, this book tells the story of the Nashua River from the time of the first Native Americans who came to live along its banks to today. Even teenagers like story time in the classroom. We also watch the documentary The Work of a 1000, the story behind Stoddart's work.

Our first try at the river was a washout literally as the day was forecast with thunderstorms, but one week later we couldn't have asked for a nicer day. I can't say enough about the quality of our guides and their knowledge of the river, its history, and the wildlife that edged the water. We saw signs of beaver, otter, and two great blue herons flew overhead. The students all enjoyed themselves, but I had a wonderful day. It was an accomplishment for me to see my students outside of the classroom and outdoors experiencing Ecology first hand. 

Thursday, May 15, 2014

Lesson on Endosymbiosis

We are wrapping up our unit on prokaryotes and today discussed the role of cyanobacteria in the environment. Current theory is that in our evolutionary history at one time cyanobacteria entered into a symbiotic relationship with another cell which eventually resulted in the first plant cells. Molecular data supports this theory of endosymbiosis for the origin of the chloroplast, as well as, mitochondria. In both cases these cellular components each have their own DNA encoding in proteins specific to these organelles.

The lesson included watching this video clip and then proceeding to carry out the lab that is described within it. The challenge is to try to get the photo down the body tube of the microscope. Some days I'm better at it than others.
Moss leaflet showing chloroplasts within the cells

Mix of cyanobacteria and algae


Wednesday, December 04, 2013

Love those Flinn Fax - Chromatography

Chromatography sample set up
Earlier this school year as I was planning out my lesson on matter for my science seminar class, along comes the Flinn Scientific -Flinn Fax flyer in my school mailbox. What perfect timing! I had planned on doing chromatography, a method for separating mixtures, and here is a nice new twist on the technique.


Sample set up
I started the students on day one with simply asking them to set up a test paper with all the different brands of pens that I had available. The following day I gave them designs to copy. They had to use their findings to determine which pens to use. Everyone was successful as you can see by the pictures below. In the future I might even use different solvents to see if they can get results that differ from those they got here (we used water as our solvent but I gave them both water soluble and non-soluble pens).

Chromatography samples running
 I am continually amazed by what activities students are most fascinated by. This one was a huge success. Many simply tried to make interesting patterns of their own.


Student Sample 1
I placed my samples in plastic bags so that they wouldn't get wet. You can see here the student's work to copy my example.  I will now have these samples to use again next year which will save me a lot of preparation time.

Student Sample 2
Included in this photo you can see the sample disks that the students had completed on day one which show the pigment patterns generated by each type of pen available for use.

Tuesday, October 08, 2013

Freezing and melting of water with Vernier Labquests

In my Science Seminar class, we are taking a look at how energy works. Energy is the capacity to do work or give off heat. All matter has kinetic energy because the atoms of a substance are constantly in motion, the measurement of that motion is what we often call the temperature of a substance. Yesterday we discussed how matter changes state when heat is applied to a substance and the relationship between kinetic and potential energy during this process. Today we conducted an experiment to verify that by completing Vernier's Freezing and Melting of Water using their LabQuest equipment. I've used this lab before and get good results. I would highly recommend purchasing their lab books if you have access to their equipment for use. I also use their probeware whenever a lab calls for a thermometer or pH probe. The equipment is easy to use and helps to develop student lab skills by the use of technology in the classroom.

Here are some pictures showing the various stages of this experiment.

The set up showing the students freezing the water.


Once the ice is frozen as shown the next step is to collect data as it is melting.


Last step in the melting process - LabQuest unit shown here.

Friday, October 04, 2013

Botany Scavenger Hunt


In the spring one of my favorite activities is to take out the students for a Botany Scavenger Hunt as a culmanating activity/assessment. I challenge them to find examples of: fungi, pteriophytes, bryophytes, gymnosperm, and angiosperm (both monocot and dicot). What is so difficult for me to understand is how little experience students have with the outdoors. Many are very unfamiliar with common types of plants which grow in their back yards. They love to ask to go outdoors but often complain once they get out there about the temperature, the sun, or the bugs. They are more apt to want to be on their phones texting their friends who are back in the building. I guess the more we get them outdoors the more adapted they will be. 
There are some who are genuinely interested in learning more about the world around them. When we returned indoors I had them mount their specimens onto paper and label. It was more amazing to see them arranging their samples and creating works of art - at least I think they are works of art. Here are a few examples for you to enjoy.


Monday, September 09, 2013

Characteristics of Living Things

Living things to observe
and jump start thinking.
 As an introductory activity to my ecology unit, I wanted students to start thinking about what makes a living thing living. To aid with the brainstorming I provided them with a live plant, a preserved animal (but told them to imagine it as living), and a packet of seeds. What characteristics, processes or needs did these three items possess that leads one to know that they are living? As you can see from the list on the white board they came up with quite a few ideas. Each year I get a different list of things. When the students are having a good day I get really complex answers like: reproduction, die, make waste (feces or urine), are made up of cells, require or consume energy, grow, require nutrients, need water, use oxygen, and the list goes on.

Once that list is generated we work on looking for commonalities between the three items in order to generate a list that all living things have. That list is generally smaller since not all living things have blood or eyes. My next step is to introduce the concept of biotic and abiotic factors. This allows us to build up the necessary vocabulary for studying the components of an ecosystem.
Lists of the characteristics, processes,
and needs of living things.

Thursday, September 05, 2013

Observations vs. Inferences

On the opening day of each new school year I get students thinking about the steps of the Scientific Method. Of course all science begins with observations. I show them the following item.

Observation bag

I hold up the bag and walk around the room showing it off, even making sure they get a view of the bottom of the bag. With a student at the white board to act as a scribe, I begin to solicit observations of the bag. Students say the following: brightly colored, pink, yellow, green, has flowers, has designs, there's a ribbon, there's a handle, there's white tissue paper inside, and the list goes on. Sometimes it's difficult to get the flow of ideas going but once someone starts it tends to get easier.

Eventually one student may make a comment like: "It's a present" or "It's for a girl." That's when I can discuss the differences between observations and inferences. Because we've had previous experience with something when we observe something new we filter our ideas through those experiences and draw conclusions. It's an opportunity to discuss how our culture influences our inferences. What if we lived somewhere where pink items were not associated with femininity?

Third step, ask students if they have questions about the bag. I usually get: what's in it, is it heavy, is it a present, who is it for, etc.

I ask for a volunteer to come up and put their hand in the bag and using only their sense of touch describe the object. They usually know what it is but are not allowed to say so to the class. Then another student is invited up to look in the bag and give only observations of what they see. I will let the class begin to ask questions of myself or the other two students, that is besides the obvious - what is it. After a few of those are answered someone usually gets the answer. And there you go in a quick, easy activity the students have been introduced to the scientific method.


Mystery item inside

Tuesday, March 26, 2013

Invasive Species Brochures

Invasive Species Brochure - Example of Student Work
After studying different ecological impacts the students put together an informative brochure about various invasive species. Using the Top 100 Global Invasive Species Database the students started their research and went from there. I have included two examples here. Part of the project was to focus on the origin of the organism, what regions had it been introduced to, what damage was it doing to these ecosystems, what steps were being taken to combat the invaders, and what if any research was being done on this particular species.

I was impressed by the work produced by the class.
Invasive Species Brochure Example of Student Work
 

Tuesday, December 11, 2012

Pond Life

Black line represents original
air bubble. Photosynthesis
in the right tube has created an
oxygen bubble.
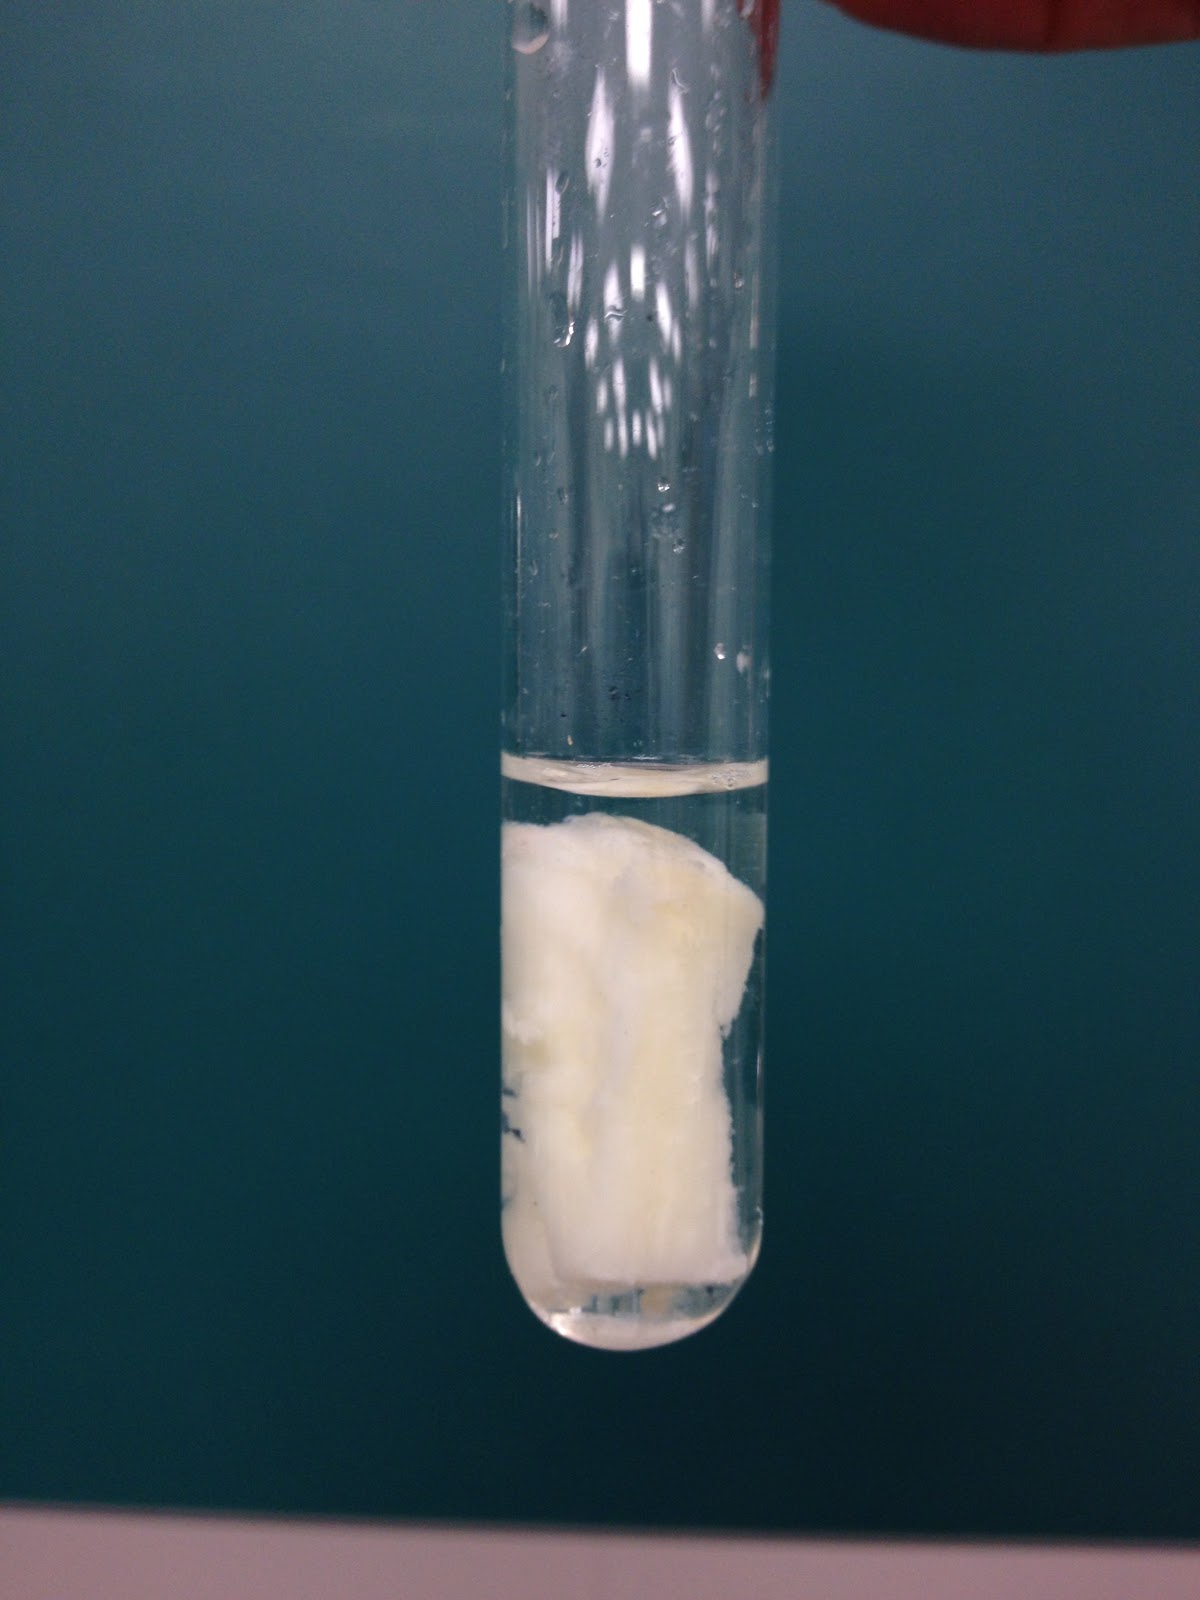
Test tubes containing pond
water. Tube on the right
received some fertilizer.


To study eutrophication I set up a small scale experiment using pond water from the wetlands on the school property. This area is surrounded by athletic fields which are treated with fertilizers. In the spring and summer there is quite the alga bloom and the nasty smell of decaying matter.

One of my colleagues set up a large scale experiment in two little fish bowls, adding fertilizer to one of the bowls. After a week or so there was clearly a difference between the two bowls. The one with the fertilizer was green and becoming greener with each passing day. I did the same except in the test tubes adding a little bit of baking soda to ensure a carbon dioxide source for the growing algae. This piggy backs on my previous post about the Nitrogen cycle. The excess use of fertilizer results in the disruption of the nitrogen cycle and the introduction of excess nitrogen into bodies of water resulting in the overgrowth of algae and the depletion of oxygen in the water causing death among other species in the water. We need to rethink our obsession with thick green lawns and how to obtain them.

Monday, December 10, 2012

It's working...

While Stumbling one day I came across a blog that described growing or should I say Re-growing celeryfrom its stalk. I decided to give it a try. It took some time but the first thing I noticed was the "greening" of the stalks as the exposure to the sunlight and access to water stimulated photosynthesis. Then from the base I began to see the formation of roots which have continued to elongate and multiply. Lastly, from the center is evidence of leaf formation. I have been keeping it on a sunny sill or what can be called a sunny sill as we approach the winter solstice. I'm also making sure to keep it well watered. Eventually I will transfer it to soil and hopefully come spring time put it out in the garden. Since I will be having the students doing an osmosis lab later this week using celery perhaps we will set one of these experiments in the lab to watch the process.
Here you can see the roots forming
at the base of the stalk
Notice the small leaf formation in
the very center.


Friday, December 07, 2012

The Nitrogen cycle


One of the books that I read this summer was Thomas Hager's The Alchemy of Air. This was a fascinating piece of writing mixing science, history and biography in a well woven tale about one of the essential elements of life. Nitrogen is needed for the production of amino and nucleic acids which all living things require. Our planet's atmosphere is 78% nitrogen yet with the rare exception of some bacteria found in soil and cyanobacteria/algae in aquatic ecosystems, living organisms can not use this inert gas directly. Through the activity of nitrogen fixation and the formation of nitric oxide from atmospheric nitrogen and oxygen gases using the energy from lightning to drive the reaction, nitrogen takes on a form that plants and other photosynthetic organisms can absorb and convert into amino and nucleic acids. Nitrogen is returned to the atmosphere by the activity of decomposing bacteria.
 
You're wondering where the book comes in. At the turn of the twentieth century the call went out to find a way to synthesize nitrogen based fertilizers to help feed the growing human population. I bet they never thought we would reach the 7 billion now on the planet, but I digress. The point being that Fritz Haber took up the challenge and designed a way to convert nitrogen and hydrogen gases into ammonia. It took the genius of Carl Bosch to engineer the necessary equipment to make it possible to make ammonia in a profitable large scale way. Today the Haber-Bosch process continues to produce the majority of inorganic fertilizers used in agriculture. According to Hager 50% of the nitrogen in our bodies comes from this process and from the foods we have consumed which have been at one time treated with fertilizers.
 
The problem now is too much nitrogen in the cycle. Excess nitrogen from fertilizers now enters into the soil and water systems. Eutrophication of lakes and the ocean occurs from the over growth of algae which impacts the oxygen levels of the water and kills other aquatic life. Excess nitric oxide in the atmosphere contributes to the formation of acid rain which can lead to pH changes in soil and bodies of water impacting the plants and animals in the affected regions. Too much of a good thing can be a problem.
 
My Ecology class recently did a unit on the geochemical cycles and we discussed the impact of human activity on the nitrogen cycle. The focus has been on the carbon cycle and climate change, that the nitrogen cycle and its disruption often goes unnoticed. The nitrogen cycle's disruption may become part of the next major ecological worries. The background knowledge I gained from this book allowed me to share how science and the development also played a role in the course of history primarily World War II when the Nazi war machine used the technology developed by Haber and Bosch to make synthetic fuel. 

Thursday, December 06, 2012

Enzyme Activity Lab

Hydrogen Peroxide and Raw
Potato
A very quick and easy lab to observe enzyme activity is one in which you use raw and cooked potatoes and hydrogen peroxide. Hydrogen peroxide is made as a by-product in cellular processes, it is toxic to cells and that is where the enzyme catalase comes in. The function of catalase is to decompose hydrogen peroxide into water and oxygen gas. You've observed this if you've ever used hydrogen peroxide to disinfect a cut or scrape. Students can observe the activity of the catalase by looking for the bubbles of oxygen that are released.

Enzymes which are a class of proteins are subject to the threat of denaturation, or the loss of their 3-D structure, when exposed to changes in pH or heat. In this lab I have the students mix in some vinegar into the hydrogen peroxide to lower the pH of the environment. As a result there is a visible slowing down of the reaction. We also use a baking soda solution to create an alkaline environment but the enzyme isn't impacted as much. Lastly, I have them test a piece of cooked potato. In the cooking process the catalase is denatured and there is no activity at all.
Hydrogen peroxide and
cooked potato
We have been investing in Vernier Lab Quest equipment for student data collection. Using a very crude methodology, I had the students stopper up the test tubes and use the Gas Pressure Sensor to observe any pressure changes that result from the release of the oxygen from the decomposition reaction. It worked. Clearly there was a significant pressure change with the raw potato and hydrogen peroxide, less change with the vinegar mixed in, and absolutely no change in pressure when the cooked potato was tested. Vernier does put out a series of experimental procedures that are more sophisticated and quantifiable. In this case I was focused on the students learning the key concepts of enzymes (active site, activation energy, catalyst) and the conditions that will lead to protein denaturation.
Testing for pressure change using a Vernier Lab Quest
with a Gas Pressure Sensor.

Wednesday, December 05, 2012

Concept mapping

In the never ending quest to assist students (high school sophomores in a college prep biology class) in learning new and difficult material, like macromolecules for example, my colleague and I developed a list of key terms for the students to map. Concept maps can take several different forms such as a top down flow chart or a web. Here I show just one portion of a larger map. As we moved through the unit I would have the students take their maps out and add new details to them. Tomorrow is the big unit test, they will be allowed to use the map on the test and turn it in for a classwork grade. Keep your fingers crossed for good results. The biggest challenge will be can they retain it as we move on in our curriculum and succeed on the mid-year exams?

Concept Map featuring terms about Lipids, includes key terms, examples, functions, etc.

Tuesday, November 27, 2012

Testing for starch

We continue with our unit about macromolecules and turn our focus on carbohydrates. All carbohydrates are formed from simple sugar monomers also called monosaccharides, examples include glucose, fructose, and galactose. Through the process of dehydration synthesis two monosaccharides become a disaccharide like sucrose made of one glucose and one fructose molecule. Start stinging more together and you get polysaccharides such as glycogen made by animals for glucose storage, cellulose by plants as a building material for sturdy cell walls (think the crunchiness of celery), and lastly starch also produced by plants for glucose storage and eaten by animals (including us) for energy (got to love those mashed potatoes).

Starch will react with an iodine solution to turn black. The iodine will react with the coil structure of starch but not with simple sugars or even carbohydrate food sources high in fiber. In the photo below you can see a sample of carbohydrates that we tested for the presence of starch. As a control I have the students start with a known sample of corn starch. Test items included: white potato, wheat bread, saltine cracker, apple, banana, table sugar, white flour, celery, lettuce, Chinese yam, macaroni, flaxseed meal, and a piece of notebook paper. Note that we give the students a wax coated paper plate to work on. Can you guess why? That's one of the post lab questions.

Tuesday, November 20, 2012

Macromolecules the "Legos" of life

The most challenging of all chapters in biology I think for sophomore level high school students is the one on the biochemistry of life. I try all types of techniques to help them with this subject matter. One thing is to use the molecule building kits to make the material presented on the 2-dimensional textbook page become a 3-dimensional reality. I remind them that they are made up of millions if not billions of these molecules and they are not flat structures themselves. Yesterday we built functional groups: hydroxyl, carbonyl, carboxyl, and amine. Then I had them put some of them together to build the simplest of all amino acids - alanine as pictured below. One of the biggest challenges is to convince them it is time to stop playing and clean up. Don't leave any atoms or bonds on the floor.

Thursday, November 08, 2012

Water, water everywhere

In Biology class we are currently in our unit on the chemistry of life. This week our focus was on water chemistry, its properties, solutions, and The pH scale. We explored the properties of adhesion, cohesion, density and capillary action by carrying out several demonstrations based on the Project WET curriculum. It was amazing to hear the students' responses to some of the activities. One young man who was playing with a large drop of water on wax paper exclaimed, "why have I never done this before!" Many were fascinated with what happened when I slipped a sheet of print under the wax paper and it was magnified. Amazing what the property of cohesion can do. Hopefully seeing water in action will help them to remember the key terms and relate them to the role water plays in life on our planet.